Table of Contents
CubexSoft Maildir Export
Working Procedure

Export Maildir As Office 365
Steps to convert Maildir files as Office 365 :
- For exporting Maildir database to Office 365, select Office 365 option from Select Saving option.
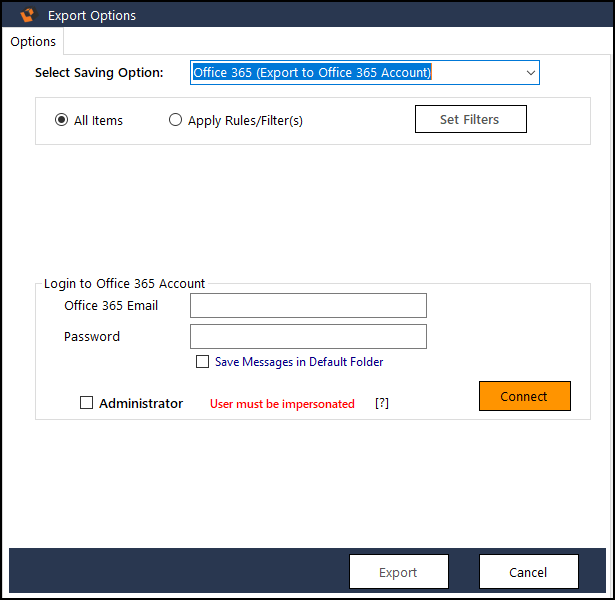
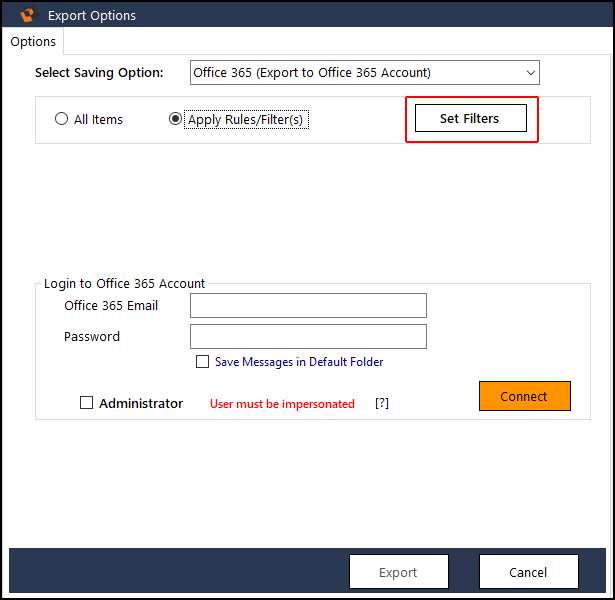
- Software allows you to convert all Maildir items to Office 365 Account. Additionally, you can also convert selective items by selecting the Apply Rules/Filters option.

- Click on Set Filters button to open the Advance filters window
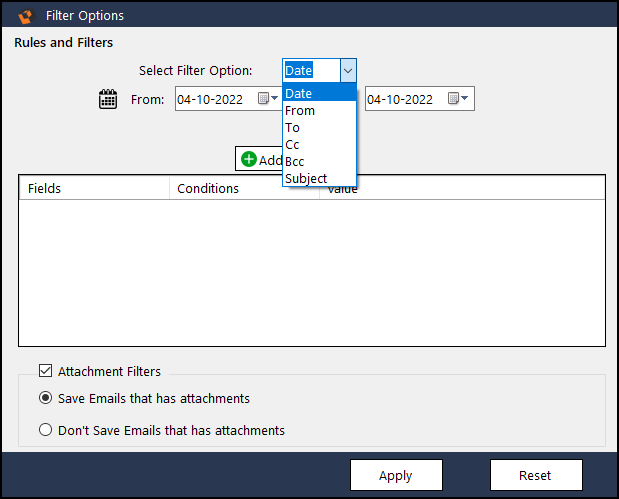
- Here you can find various advance filter options to choose from :
- Date Range: User can select date range to save emails only the selected date range
- FROM, TO, CC, BCC Fields: Users can choose specific email addresses to save Maildir emails
- Subject Filters: Users can filter the final saving by saving the emails that contains specfic words and phrases
- Attachment Filters: Users can use this filter to save only those emails that have/don't have attachments.
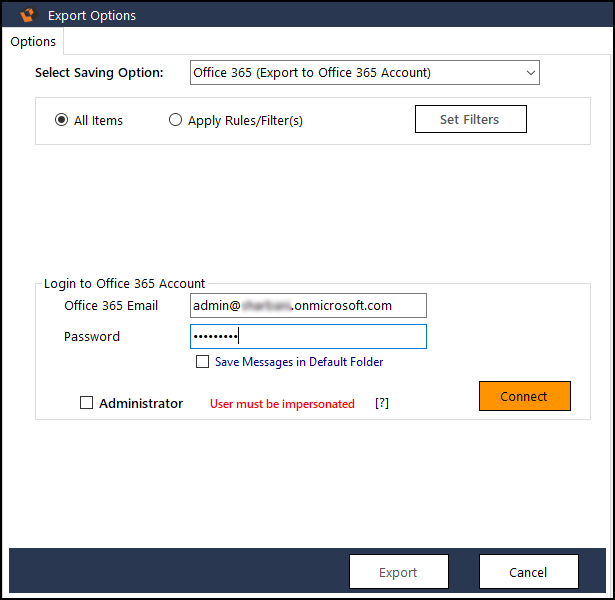
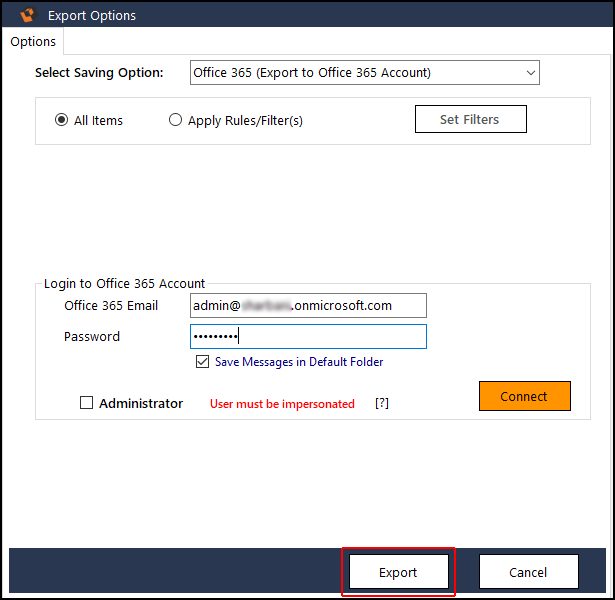
- Now, enter your Office 365 account credentials into which you want to migrate Maildir files
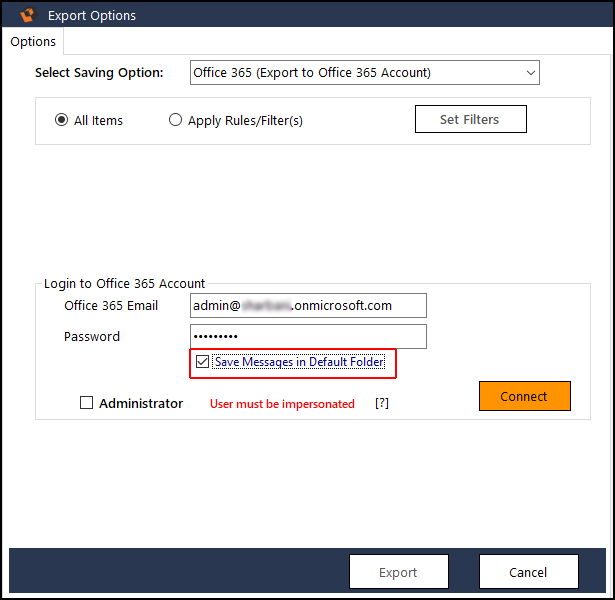
- You will get "Save Messages Default Folders" option to move Maildir folders to default folders of selected Office 365 account. Unchecking this option will transfer complete Maildir data in a separate folder in Office 365 account.
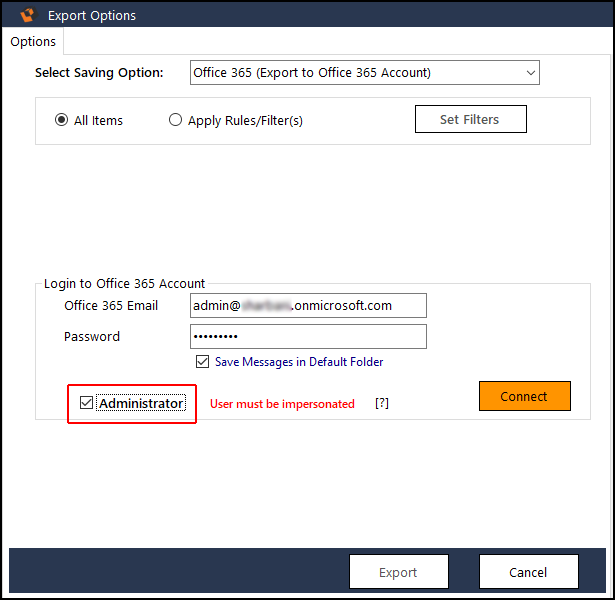
- The software also provides "Administrator" option to import unlimited Maildir user profiles to respective user profiles of Office 365 admin account. Tick this option if you want to migrate Maildir mailboxes to Office 365 admin user accounts. Otherwise, leave it blank to upload all Maildir files to Office 365 user account.
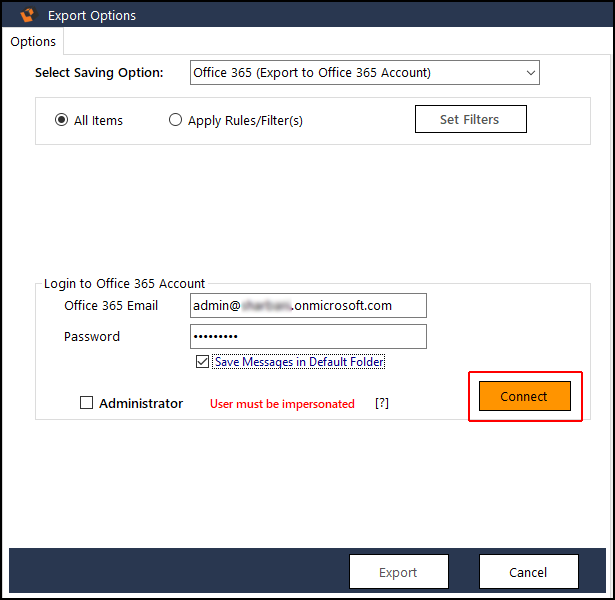
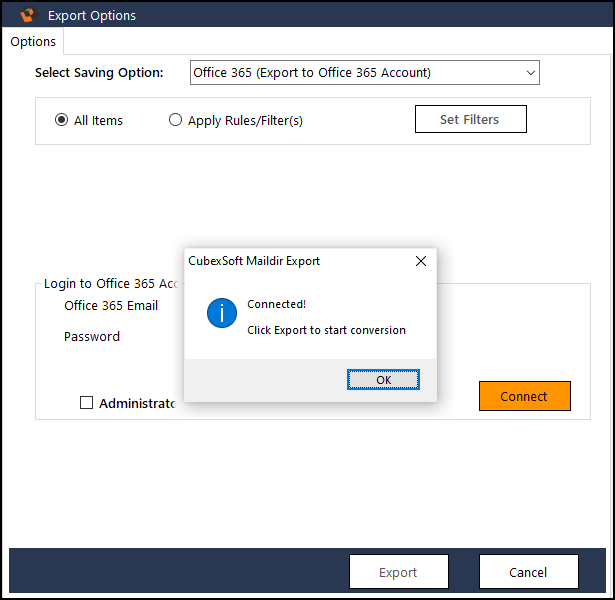
- Now, click on Connect button to connect with your Office 365 account (without selecting Administrator option).
- A pop-up window will open showing the "Connected" message. Click on OK button to proceed further.
- Now, click Export button to start the Maildir to Gmail Conversion process.
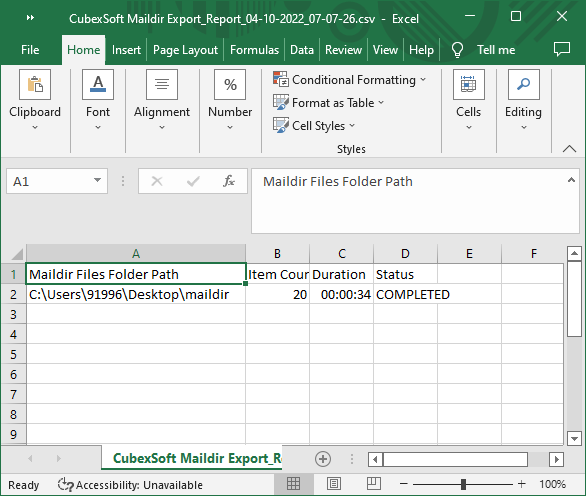
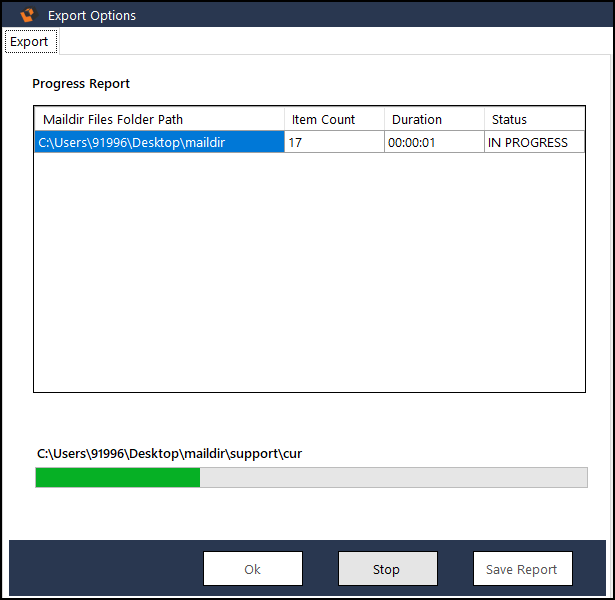
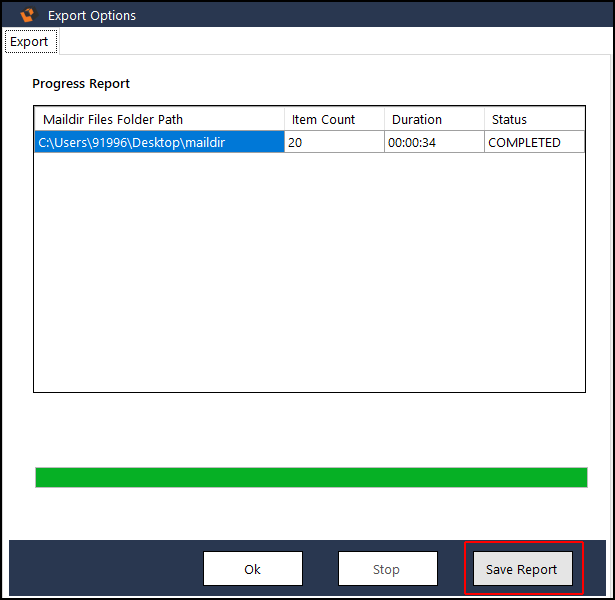
- The software will now start the Maildir conversion process and show live progress report, displaying the details - Source Path, Item Count, Duration and Status.
- After completion you will get a Dialog box saying “Export Completed Successfully”. Click on Ok.
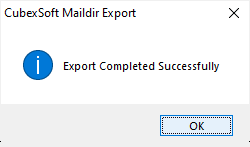
- Once you click the OK button, the software will enable two buttons OK and Save Report. If you want to exit the application, click OK. If you want the complete conversion progress report, hit Save Report button, which will save the detail of processing in CSV file as a record.
- Navigate to the folder location of your resultant files and click on the .csv file to open and access the conversion report