Table of Contents
CubexSoft Office 365 Backup and Restore
Working Procedure

Backup Office 365 to Exchange Server
Steps to backup Office 365 user mailboxes to MS Exchange Server:
- For exporting Office 365 database to Exchange Server, select Exchange option from Select Export Type options.
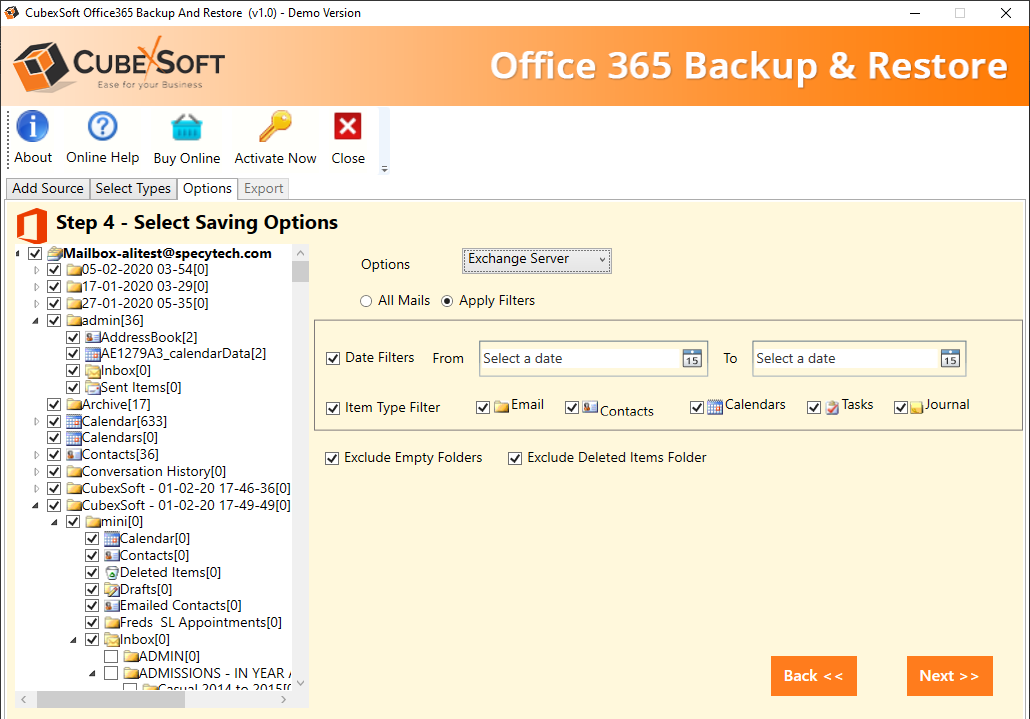
- The software allows to backup complete Office 365 user mailbox data to MS Exchange Server. You can also choose desired Item Type using Apply Filters option. Various filters provided by the software are :
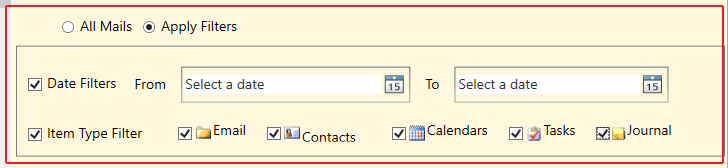
- Date Filters
- Item Type : Emails, Contacts, Calendars, Tasks, Journals
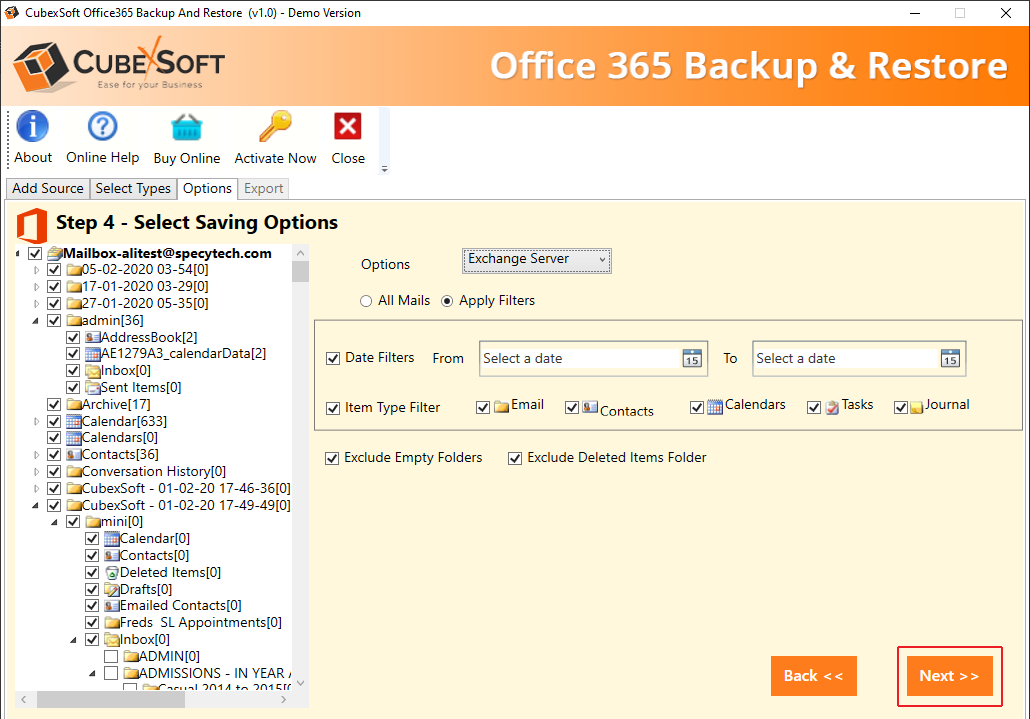
- Next, click on Exclude Empty Folders and Exclude Deleted Items folder checkboxes, if you don't want to save Empty folders and deleted items folders.

- Click on Next button to move to next step.
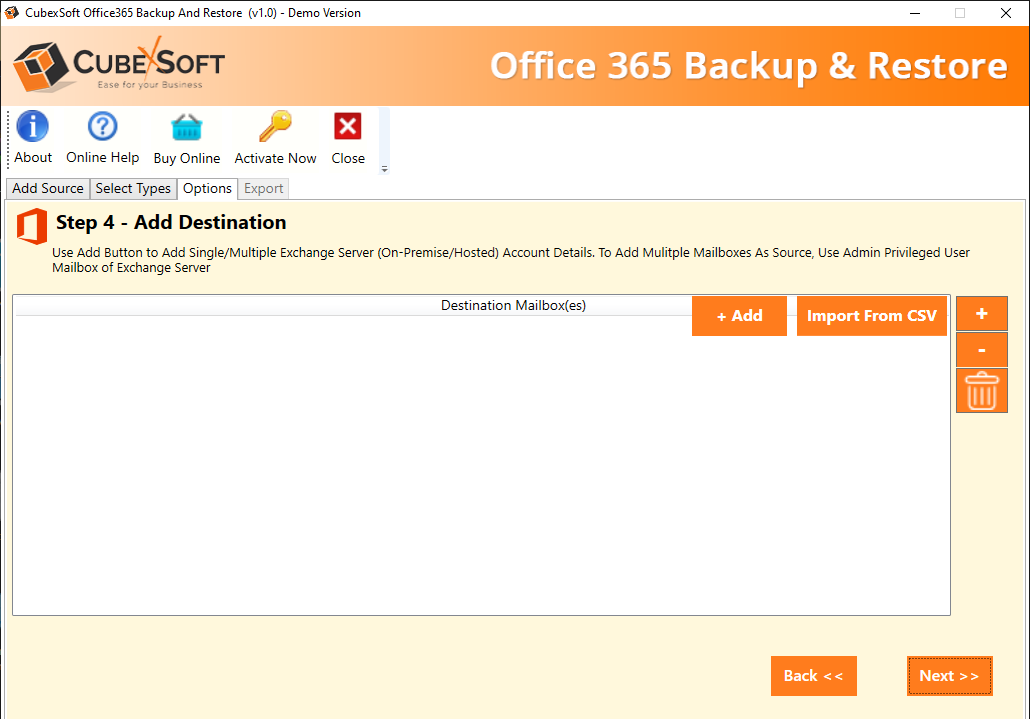
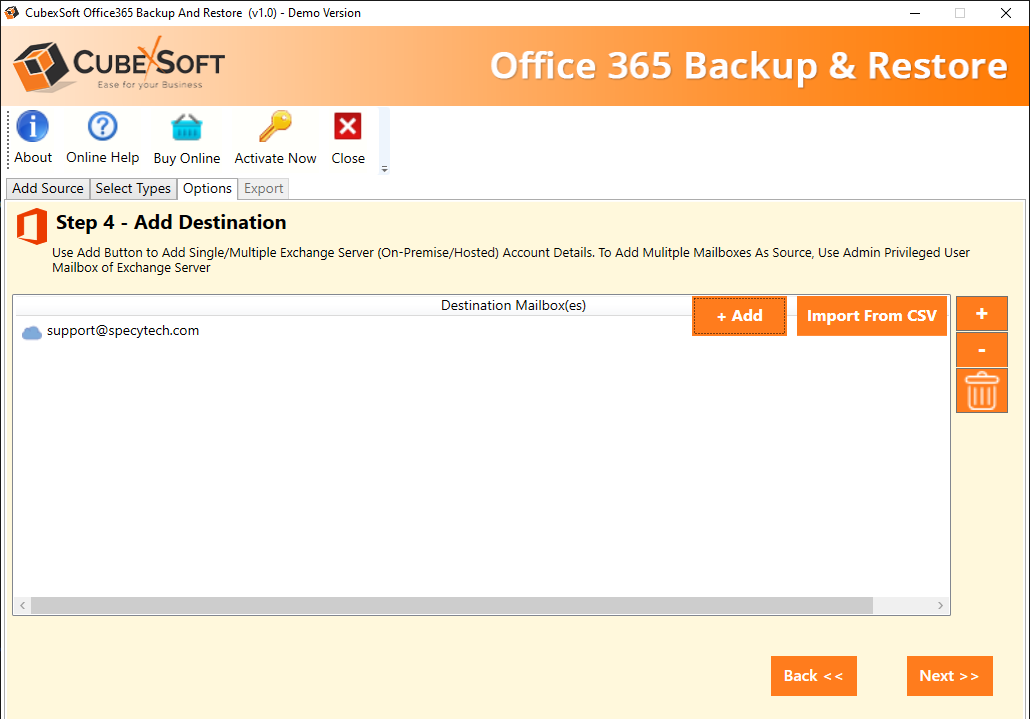
- The software will now open Add Destination window where you need to Add Office 365 account into which you want to move your Office 365 mailboxes. You can click on Add and Import from CSV options, as per your choice.
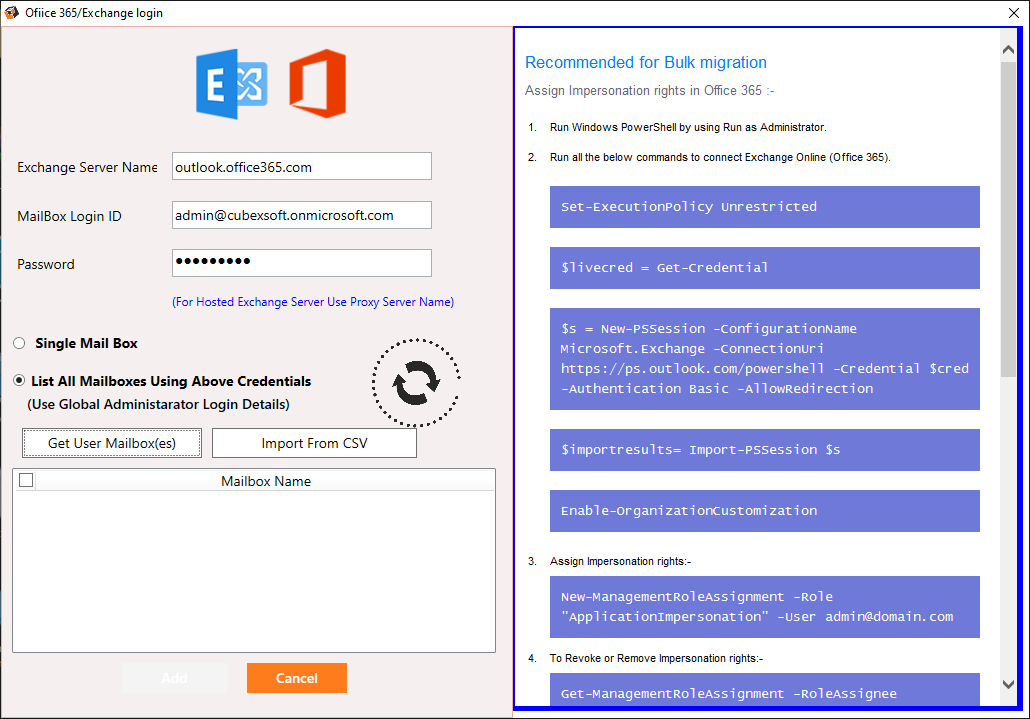
- As you click on Add button the next window will open prompting you to enter Office 365 login details.
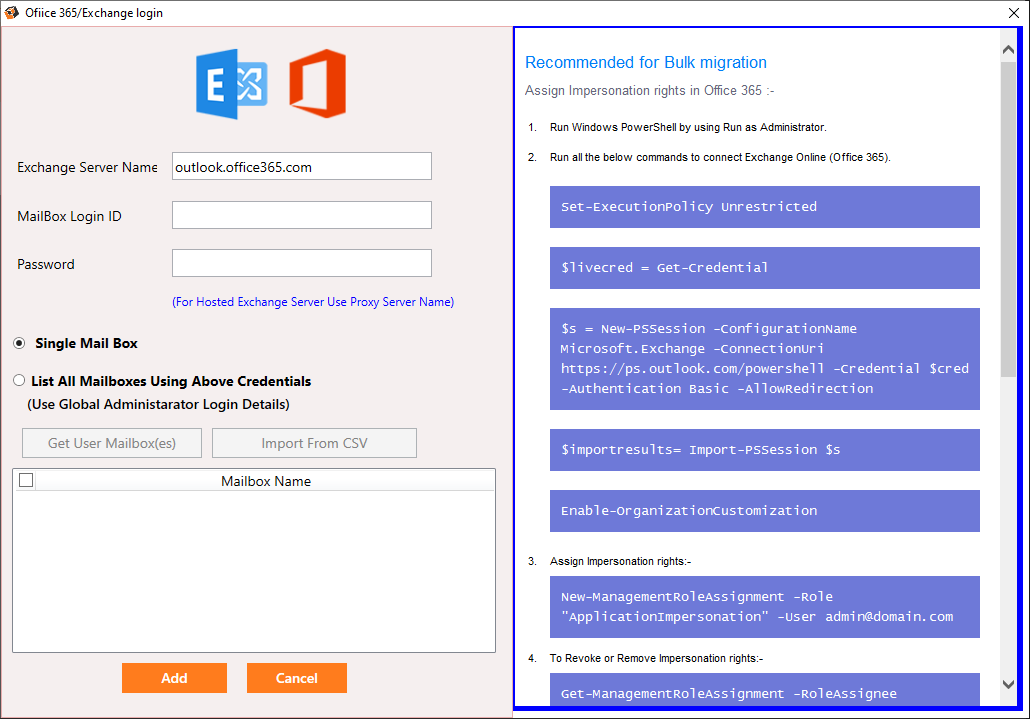
- Enter your Office 365 login credentials.
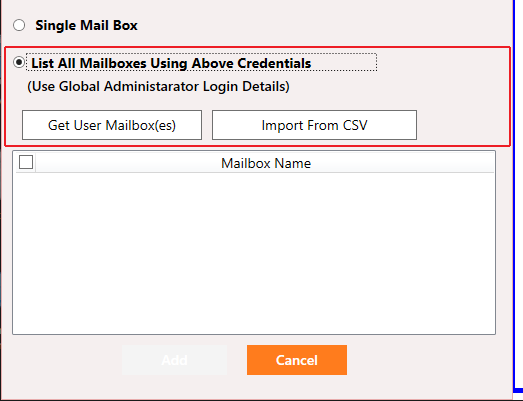
As you can see, you will get two options Single Mailbox and List All Mailboxes using above credentials, as shown below -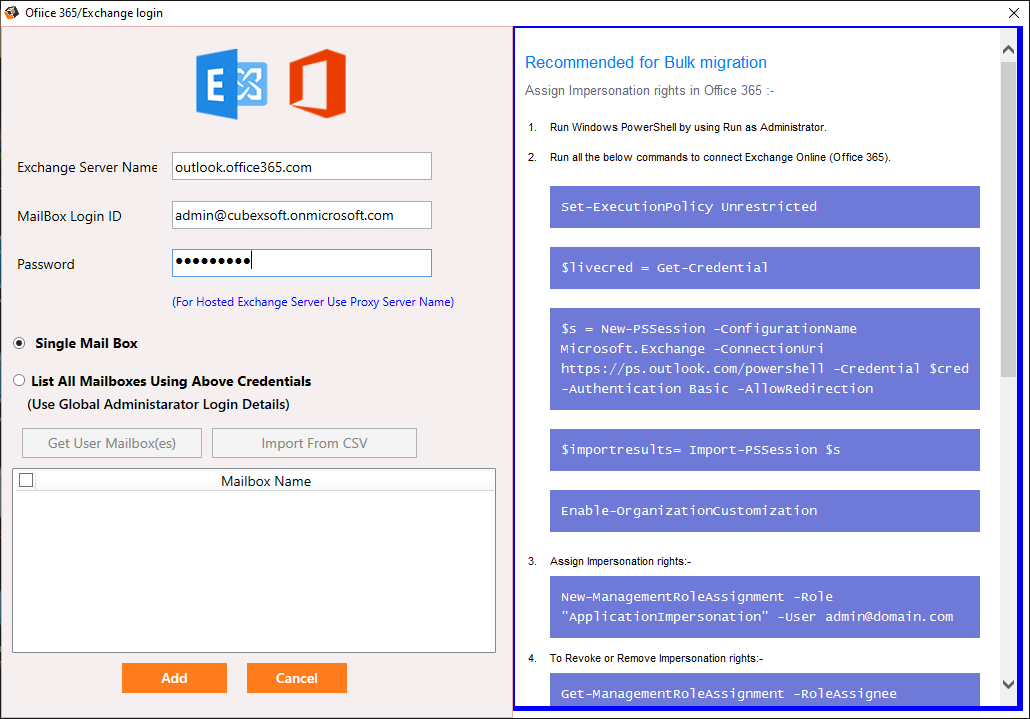
- If you click on Single Mailbox, then click on Add Button
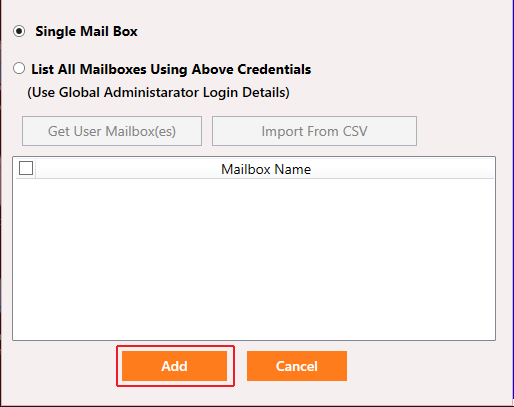
- Or, if you click on List All mailboxes using above credentials, the following options will be highlighted click on Add Button
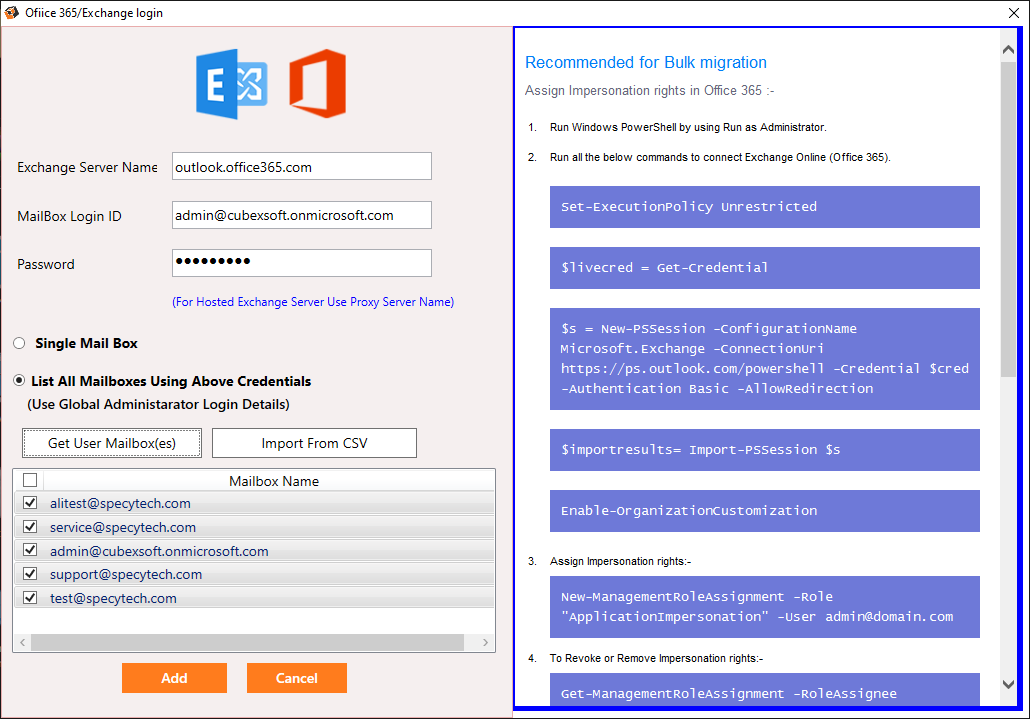
- The software will now start logging in to your specified Office 365 account
- The software will next show all the user mailboxes associated with specified O365 account. Select the required mailboxes that you want to backup and click on Add button.
- Now the software will display all selected user mailboxes in Add Destination List. click on Next button to go to next step.
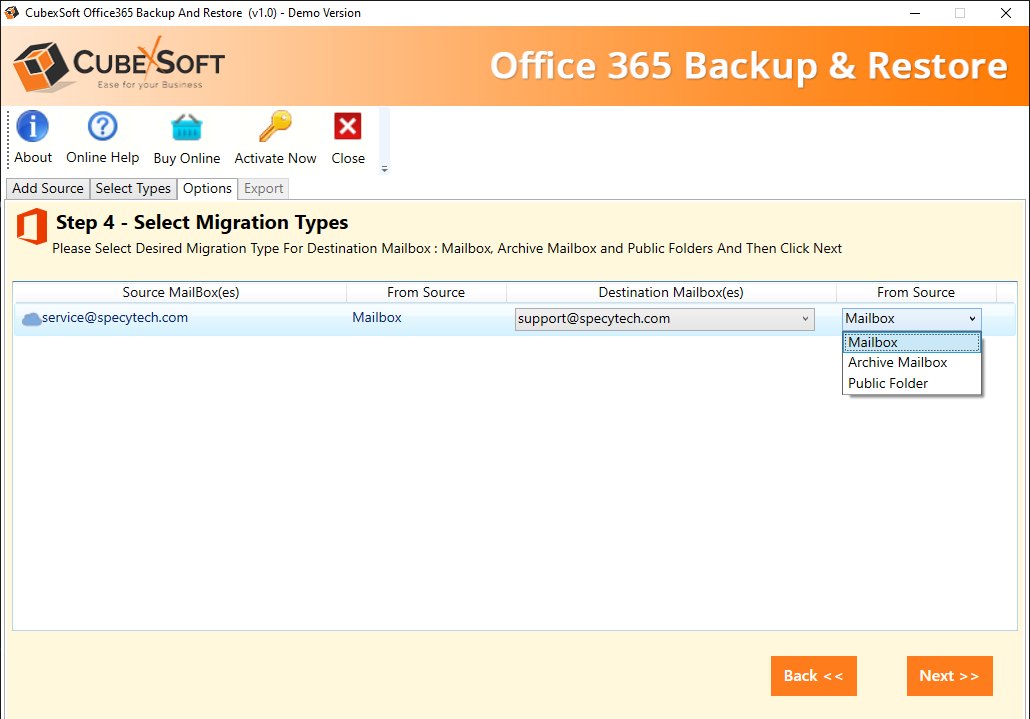
- Now you need to select desired migration type for destination mailbox and then click on Next.
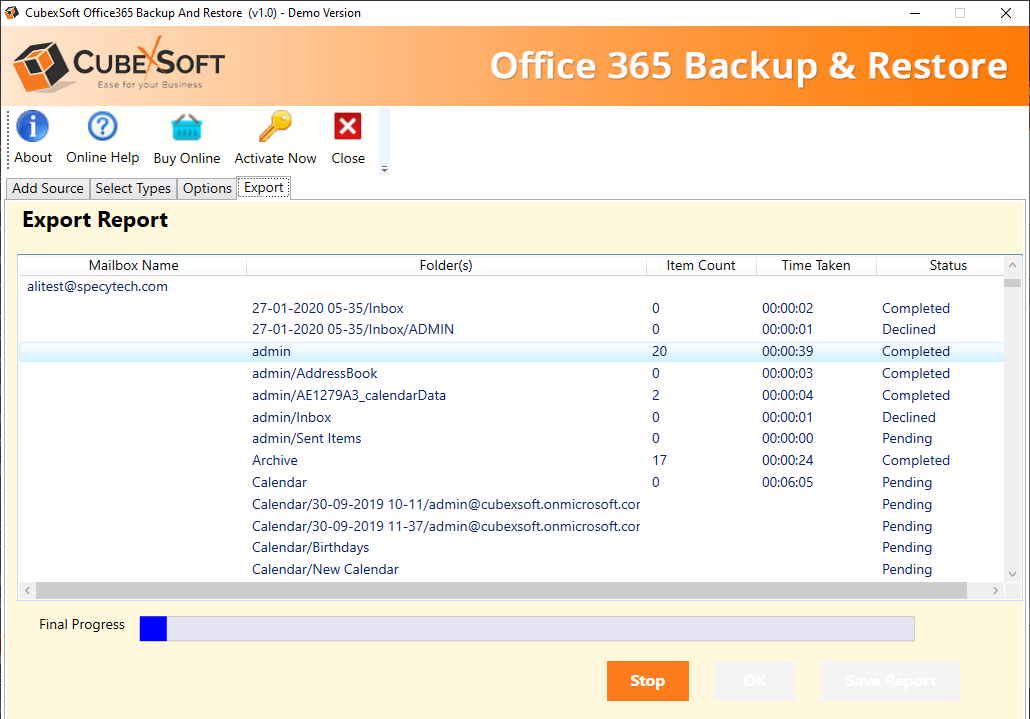
- Once you click on Next button the software will start the process of Office 365 to EML conversion. The export process will display every detail about the conversion such as Mailbox Name, Folders, Item Count, Time Taken, Status etc.
- Once the software done with the process, it will open an alert window showing successful completion of conversion process. Click OK button to finsh the process.
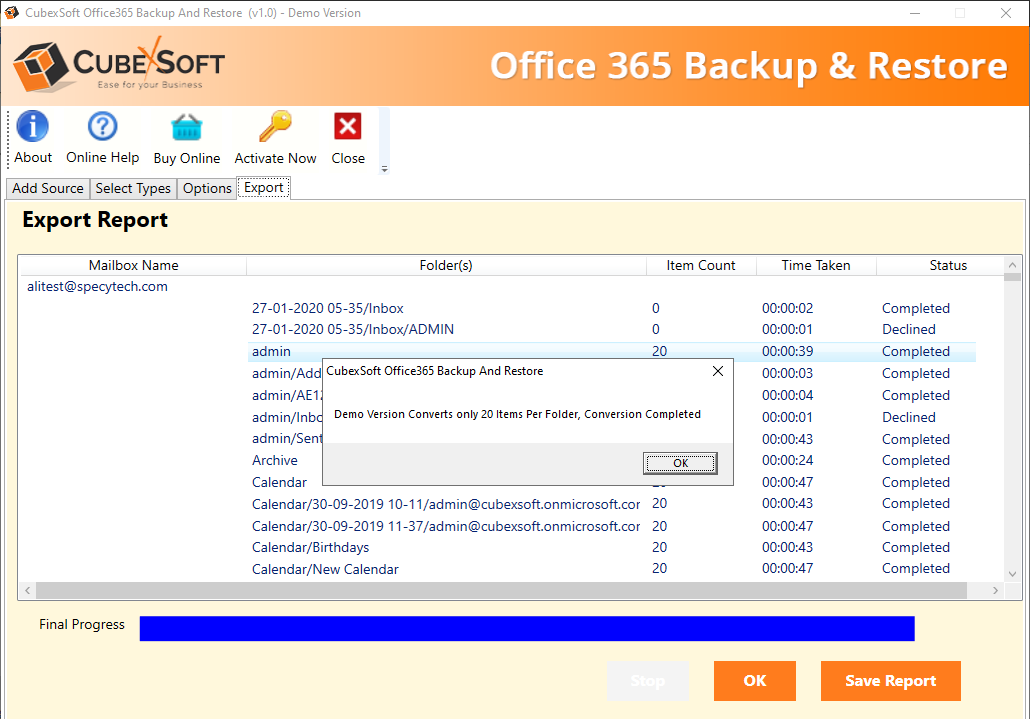
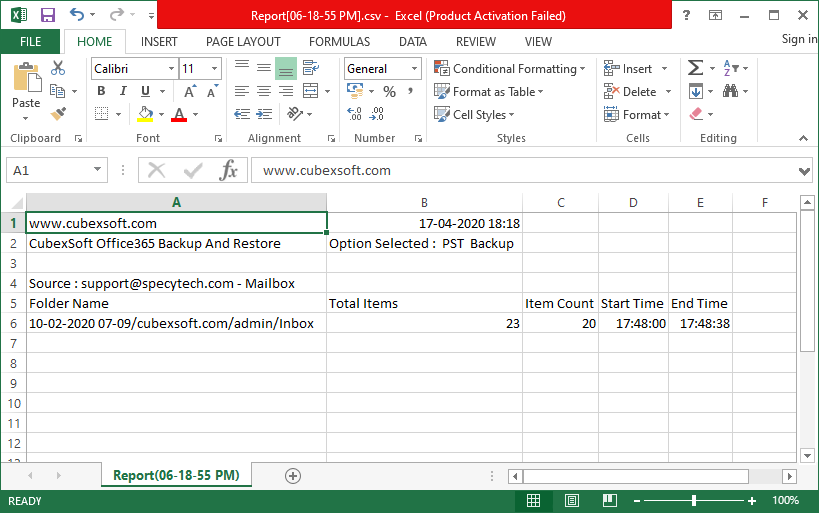
- Once you click the OK button, the software will enable two buttons OK and Save Report. If you want to exit the application, click OK. If you want the complete conversion progress report, hit Save Report button, which will save the detail of processing in CSV file as a record.
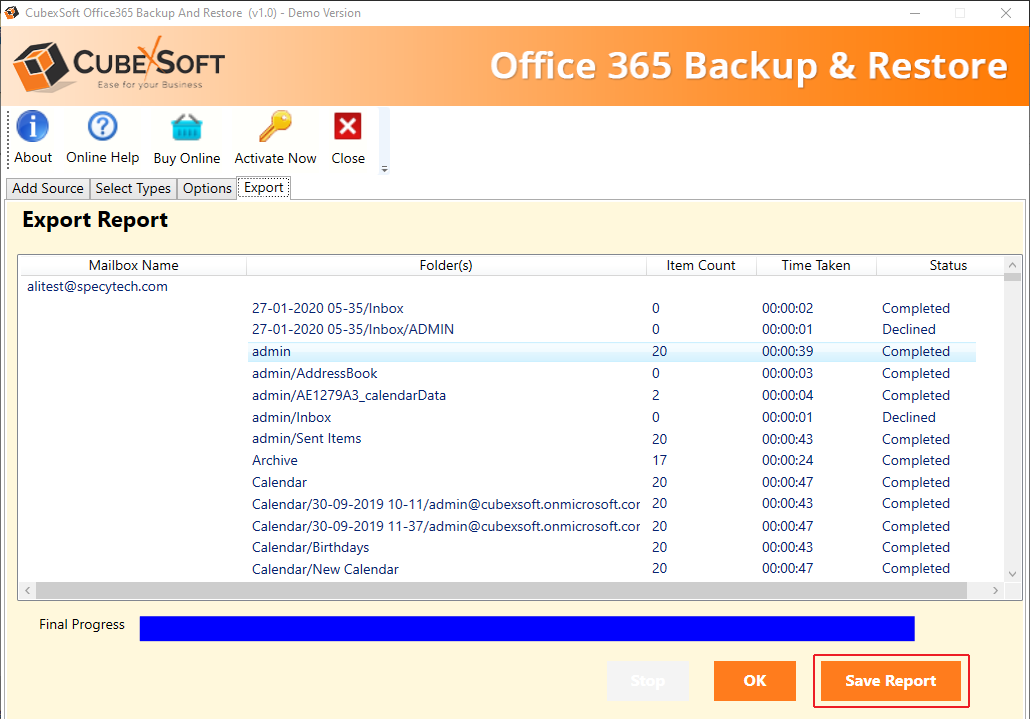
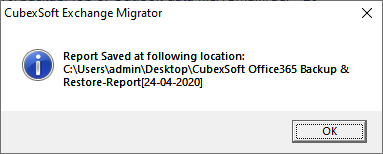
- A new window will open showing the message of successful saving of conversion report. Click OK button to finally finish the process and exit the application.
- Navigate to the folder location of your resultant files and click on the .csv file to open and access the conversion report.